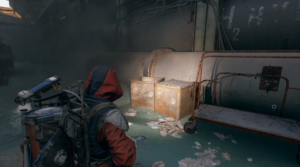

The surface just got a lot more dangerous in ARC Raiders. Two new ARC units — Firefly and Comet — have shifted the combat meta away from slow, cover-trading firefights and toward high-pressure, mobility-focused engagements. These enemies punish hesitation, poor positioning, and uncoordinated squads.
The Firefly isn’t just another flying ARC. While older airborne machines hovered at predictable distances, the Firefly closes gaps aggressively and keeps constant pressure on its target. It excels at forcing players out of cover and punishing anyone who tries to sprint across open terrain.
What Makes Firefly So Dangerous?
Persistent target tracking
Sustained flame damage over time
Strong pressure in tight spaces
Highly accurate aerial repositioning
If you react emotionally instead of tactically, you’ll burn down fast.
1.Break Target Lock with a Cloak
A Photoelectric Cloak is one of the safest counters when things go wrong. It disrupts ARC targeting systems, giving you a short window to reposition or heal.
This is especially valuable when:
You’re low HP and being chased
Multiple ARCs are active
You need to disengage and reset
Trying to out-damage a Firefly while exposed is rarely the right call. Survival first, damage second.
2.Target the Yellow Fuel Tank
The Firefly’s biggest weakness is its exposed flamethrower fuel tank — a bright yellow canister mounted on its frame.
How to land the shot reliably:
Wait until it pauses or hovers
Use burst fire or semi-auto precision weapons
Avoid panic spraying
Destroying the tank can eliminate it almost instantly, saving ammo and preventing extended burn damage.
3.Never Flee Across Open Ground
Open terrain favors the Firefly. It dives, tracks efficiently, and keeps constant line-of-sight pressure.
Instead:
Move inside buildings
Break vertical sightlines
Force tighter angles
Indoors, its mobility is reduced, and you’ll have better opportunities to line up weak-point shots.
4.Use Lure Grenades to Control Chaos
Lure Grenades don’t kill the Firefly — but they buy time.
Best moments to deploy:
Reviving a teammate
Fighting mixed ARC groups
Securing an extraction zone
Think of them as tempo control, not a permanent solution.
Comet – The Rolling Detonation Machine
Where Firefly applies pressure over time, the Comet is pure burst lethality.
This heavily armored rolling unit charges targets and detonates with catastrophic force. If you’re caught inside its blast radius, survival chances are slim.
Why Comet Is So Lethal
Massive explosion radius
Thick frontal armor
Smart target prioritization
Self-destruct mechanic
It doesn’t chip away at your health — it commits to ending the fight in one decisive moment.
1.Force It to Open from Range
When engaged at mid-to-long distance, the Comet briefly opens, exposing its inner core.
Optimal approach:
Start the fight from range
Wait for the “open” animation
Focus fire on the exposed core
Missing these windows drags the fight out — and longer fights mean higher risk.
2.High Fire Rate Beats Raw Damage
Against Comet, damage per second matters more than heavy single shots.
Automatic weapons outperform slow hitters because:
The vulnerability window is short
You need consistent core damage
Burst timing is critical
Fast rifles and SMGs shine here.
3.Spread Out in Squad Play
The Comet is built to punish grouped players.
Smart squad positioning:
Maintain distance between teammates
Form a loose engagement arc
Avoid stacking on objectives
Spacing turns a potential squad wipe into a manageable recovery.
4.Remove Side Armor First
The Comet’s frontal armor is extremely durable. Its side panels, however, are more vulnerable.
Advanced positioning tips:
Circle-strafe if terrain allows
Coordinate crossfire angles
Focus on stripping side plating
Once armor breaks, the core becomes much easier to destroy.
5.Stay Calm During a Charge
When a Comet rolls straight at you, instinct says run. That’s not always optimal.
High-risk, high-reward tactic:
Hold position briefly
Shoot the exposed front weak point
Dodge at the last possible second
Executed correctly, this can end the fight quickly. Executed poorly — you’re scrap.
Loadout Adjustments for the New Meta
With Firefly and Comet in rotation, flexible builds are mandatory.
Recommended balance:
Precision weapon (weak-point control)
Automatic weapon (burst vulnerability damage)
Utility tool (cloak or lure grenade)
Adequate ammo reserves
Surface combat is no longer about specializing into one damage style — adaptability wins.
Protecting Your High-Value Gear
High-risk zones now carry greater punishment. Losing upgraded ARC Raiders Items to a Comet detonation hurts far more than losing basic gear.
If you’re pushing harder content tiers:
Optimize builds before committing
Practice weak-point discipline
Consider progression acceleration options like cheap ARC Raiders BluePrints to craft stronger loadouts faster
The goal isn’t just survival — it’s consistent extraction.